Bulbs are the “surprise and delight” element of any garden. From the first snowdrops peeking through the barren soil in January to the final blooms of nerines in December, choose the right combination and you can have beautiful flowers all through the year.
Planting bulbs is an easy garden job that really pays off. Set aside a couple of hours to plant up some containers or scatter some bulbs across a section of lawn in the autumn, and come spring, you’ll be rewarded with beautiful flowers that will come back year after year. In this guide, you’ll find out which bulbs to plant when, how to plant bulbs in beds, containers and grassed areas, and which bulbs need lifting and storing. Let’s get started!
When to plant bulbs in the UK

You plant bulbs at different times of the year depending on when the plant flowers. It’s best to plant bulbs as soon as you can after buying them, so it’s worth planning ahead and pre-ordering bulbs to make sure you get the varieties you want.
Spring-flowering bulbs: Plant spring bulbs in autumn, between September and November. Narcissus, crocuses, bluebells, fritillaries and hyacinths are best planted by the beginning of October, whereas tulips should ideally be left until after the first frost (usually November or later) to prevent fungal diseases. Find out more about ordering and planting spring-flowering bulbs.
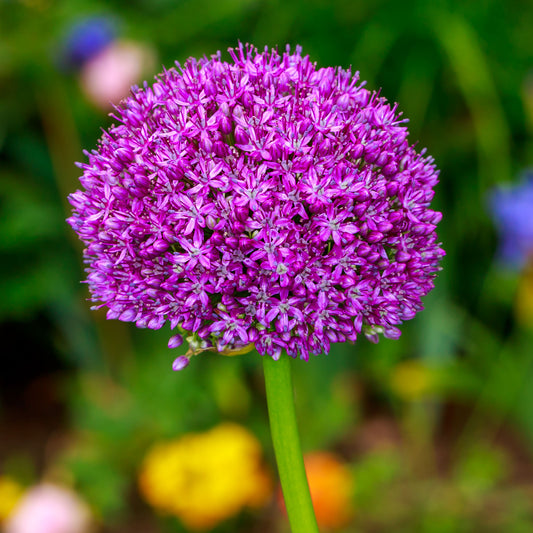
Summer-flowering bulbs: Hardy bulbs like alliums, irises, crocosmia and lilies can be planted in early autumn (no later than October unless your climate is very mild). Tender summer-flowering bulbs such as gladioli, dahlias and freesias should be planted outside in spring.
Autumn-flowering bulbs: Plant colchicums and crocuses such as Crocus sativus (which produces saffron) in late summer (August–September). The plants may flower later than normal in the first year. Cyclamen hederifolium and sternbergias can be planted between September and November, though you’ll need to have them in the ground by early October if you want flowers in the first year. Nerines should be planted in late spring to early summer (April–June).
Winter-flowering bulbs: Plant snowdrops, early crocuses, Cyclamen coum and Iris reticulata in the autumn (September–November) for flowers in late winter and early spring.
If you miss any of these optimal times to plant bulbs, don't worry – just get them in the ground as soon as you can. You may be surprised at how well they do, and you definitely won’t get any flowers if you leave them rotting in a shed! If you’re growing bulbs in containers, you can move them indoors or into a greenhouse to help them establish roots before exposing them to colder temperatures.
How to plant bulbs in the garden

Before getting started, plan which bulbs you’re going to plant where. You can plant bulbs in blocks for dramatic effect or dot them around individually or in clumps to create a more natural look. Place smaller bulbs at the front of borders and taller varieties further back as part of the mid-layer. You can also grow bulbs in planters or raised beds, which can work well if you’re growing them specifically for cut flowers.
Most bulbs prefer a sunny site with well-draining soil, but some, such as bluebells and snowdrops, prefer partial or dappled shade. Check when you’re buying bulbs to make sure they’ll be suited to the spot that you want to grow them.
Prepare borders and beds for planting by removing any weeds, turning over the soil and digging in organic matter (e.g. compost, leaf mould or well-rotted manure). This helps improve drainage and enrich the soil.
Once you've prepared the soil, it's time to get those bulbs in the ground! Wherever you’re planting bulbs, the rule of thumb for the planting depth is to dig two to three times the bulb's depth. So if your bulb is 6 cm long, dig 12–18 cm down. This is a general guide, and it’s always worth checking the instructions for your specific bulb. The correct planting depth for tubers and rhizomes varies from plant to plant.
The quickest way to plant a block of bulbs is to dig a trench to the correct depth. Position the bulbs in the base of the trench, making sure that each bulb's “nose” (the pointed end from which the shoot emerges) is facing upwards. If you’re planting bulbs further apart, dig individual holes with a trowel or bulb planter and drop each bulb in. Cover the bulbs gently with the soil you dug out, then give them a quick drink if the soil is dry. If you’re planting bulbs in autumn, you may be able to get away without watering, as long as the soil is moist.
Planting bulbs in pots

Growing bulbs in pots is a quick, easy way to give your patio or garden a burst of spring or summer colour. You can grow most bulbs in pots and mix and match different bulbs to give a varied display or a succession of flowers throughout the season.
When planting bulbs in containers, you can space them closer together – around a bulb’s width apart or even closer if you want to pack them in. Choose a large pot and add 10 cm of compost to the bottom. Position your bulbs nose up and cover with a thick layer of compost, then water well. You can add a layer of gravel to the top to help prevent weeds or plant a late-flowering cyclamen for some autumn and winter colour.
Bulbs don’t like waterlogged soil, but you don’t want your pots to dry out completely. Once the first shoots appear, water regularly and feed weekly with liquid tomato feed or another high-potassium fertiliser.
Layering bulbs in pots
Have you ever heard of a “bulb lasagne”? It’s a technique where you layer bulbs in a container or bed to create a long-lasting display. As one flower dies back, the next shoots up to take its place.
When layering your “lasagne”, you want the largest, latest-flowering bulbs on the bottom and the smallest, earliest bulbs on top. For example, you could start with a late tulip like Tulip ‘Queen of Night’ or an allium such as Allium ‘Ambassador’ or Allium cristophii. Add a layer of compost, and then a mid-season tulip or traditional daffodils. Choose a smaller variety of crocus or muscari for your top layer.
Think about how you want your display to look as each flower comes through, and try to avoid planting bulbs directly on top of one another. You could start with a ring of tulips, set a little in from the side of the pot, then plant your daffodils in a clump in the middle, with muscari around the outside of the pot. This gives the bulbs space to grow and ensures your flowers and foliage are spread across the container.
Planting bulbs in a lawn

Daffodils and crocuses popping their heads up from the grass are a cheerful sight and a welcome sign of spring. Over time, the flowers will naturally spread to create a drift of colour across your lawn. Any late-winter or spring-flowering bulbs are suitable for planting in grass. You can also plant late-spring or summer-flowering bulbs in meadow areas you’re not planning to mow.
Here’s how to plant bulbs in a lawn:
-
Scatter your bulbs randomly over an area of grass that you’re happy to leave unmown for the first part of the year. Avoid areas that are walked on regularly.
-
Use a bulb planting tool or small trowel to make a hole three times the depth of the bulb.
-
Drop a bulb into each hole and loosen some of the soil from the turn you’ve dug up to cover the bulb.
-
Replace the turf plug so it’s level with the ground.
-
For small bulbs, you can group several bulbs together in a hole or lift a section of turf and scatter the bulbs across the soil underneath.
-
Once all the bulbs are covered, water them well.
Wait until your bulbs have flowered the following spring and the foliage has turned yellow and died back.
Protecting bulbs from squirrels
If you are worried about squirrels digging up your newly planted bulbs, you can place a section of metal netting, like chicken wire, over the area where your bulbs are planted. You can also use wire netting to cover pots and containers. Squirrels don’t tend to go for bulbs once shoots have formed, so you can remove the wire mesh then and store it ready for bulb-planting season.
How to store bulbs

You can leave hardy bulbs in containers or in the ground to flower year after year. However, some bulbs require lifting and storing for part of the year. Some varieties of tulip benefit from being lifted and stored over the summer before being replanted in late autumn. You can plant out potted hyacinth bulbs in autumn to flower again the following year.
Many summer-flowering bulbs, like dahlias, gladioli, and begonias, will struggle with UK winters, unless your local climate is very mild. If you’ve grown them in containers, you can move these inside or into a frost-free greenhouse over the winter. Bulbs in beds are best dug up, stored over winter and replanted in spring.
Here’s how to store bulbs to prevent them from rotting:
-
Remove spent flower heads and wait until all the foliage has died back before lifting bulbs.
-
Dig up the bulbs gently using a garden fork and shake off excess soil.
-
Spread the bulbs out in a cool, dark place to dry for a few days.
-
Store bulbs in a labelled paper or mesh bag, in a cool place away from direct sunlight.
To store non-hardy tubers and rhizomes like dahlias, begonias and cannas over winter, bury them in trays or boxes filled with vermiculite, peat moss, dry compost or sand. Store them in a cool, frost-free place such as a garage or shed.
Related pages
Get more detailed information on planting different types of flower bulbs on our plant care pages:
FAQ
How do you plant bulbs?
Dig a hole two to three times the depth of the bulb and place the bulb with the tip pointing upwards. Refill the hole with soil and give it some water. If you’re planting small bulbs or a large area of bulbs, it may be quicker to dig a trench to the correct depth rather than individual holes.
How deep should you plant bulbs?
Most bulbs should be planted in a hole two to three times the depth of the bulb. So, if your bulb is 4 cm long, it should be planted 8–12 cm deep. There are some exceptions to this rule, so it’s always worth checking the guidance for the bulbs you’ve purchased before planting them.
When should you plant bulbs in the UK?
Autumn is the best time to plant most bulbs, including spring-flowering bulbs like daffodils, crocuses, snowdrops and tulips, and hardy summer bulbs like alliums, irises and lilies. Non-hardy bulbs and tubers such as dahlias, begonias, gladioli and freesias should be planted in spring, once the ground has warmed up.
Is it too late to plant bulbs?
While most hardy bulbs should be planted in autumn and non-hardy bulbs in spring, if you’ve passed the optimum planting time, it may not be too late! Tulips can often be planted until the end of January, or even February, and flower successfully. As long as your bulbs look healthy, plant them out and see what happens – you won’t get any flowers if they’re left to rot in your shed!